COMELIT APP
Smart Registration
Do you have a Comelit system and wish to manage it via the Comelit App? This guide provides all the necessary information to do so.
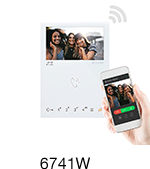
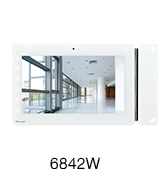
Do you have a Comelit video entry device (6741W, 6742W, 6842W, 1456B, 1456, 1456S, VS8111)?


Click here and find out how to configure your video entry system now.
Do you have the Comelit Hub home automation supervisor (2003150)?
Click herend find out how to configure your home automation system now.
Do you have a Vedo or Secur Hub intruder alarm control panel?
Click here and find out how to configure your alarm system now.
If you’ve already configured your Comelit system in the Comelit App and want to link it to your Amazon Alexa, click here.
CONFIGURE YOUR VIDEO ENTRY SYSTEM
Requirements:
To manage the video entry system using the Comelit App, you need:
-A home Wi-Fi network connection
– One of the following devices:
– Mini Wi-Fi (6741W),
– Mini ViP Wi-Fi (6742W),
– Maxi ViP Wi-Fi (6842W)
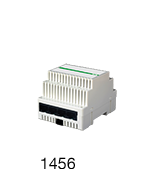
– Multi-user Gateway for ViP system (1456B)
– Apartment Master Gateway for ViP system (1456)
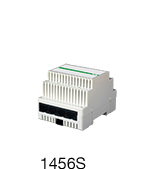
– Apartment Slave Gateway for ViP system (1456S)
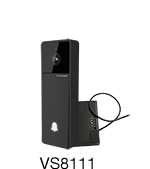
– Visto Wi-Fi ViP (VS8111)
Configuration Steps:
1. Install the Comelit application from the respective stores, connect to your Wi-Fi network using your smartphone/tablet, and open the application
2. Log in if you already have a Comelit account, or create a new account.
3. Add your video entry system:
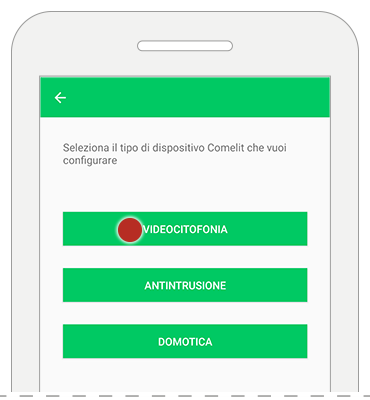
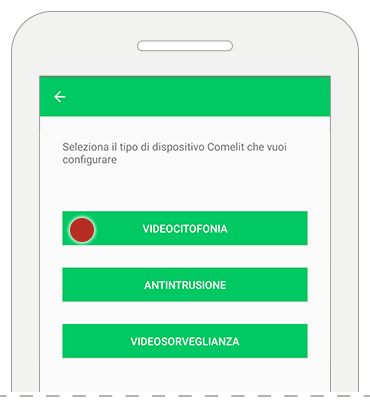
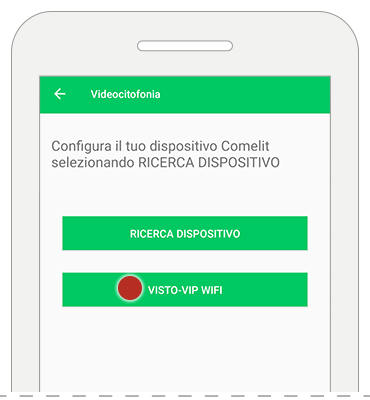
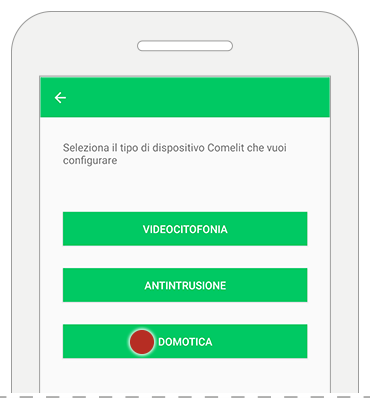
a) If no Comelit system has been configured: the app will display the following screen; select “VIDEO ENTRY”.
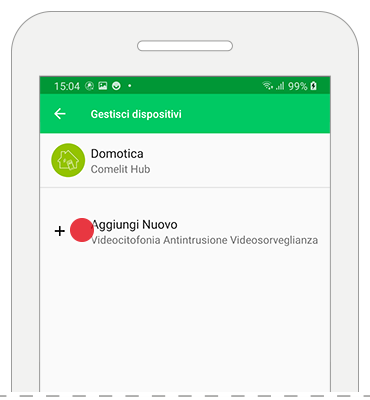
b) If you wish to add the video entry system to an existing system (home automation or intrusion):
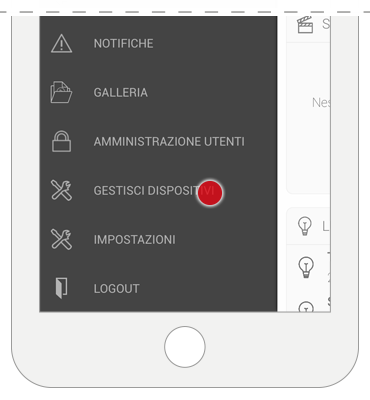
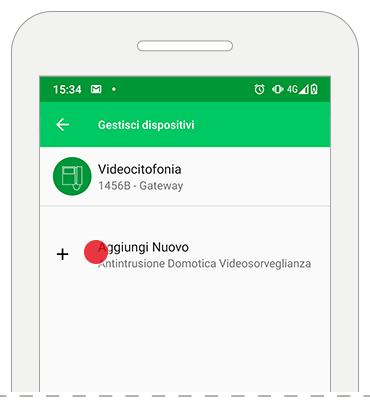
– Enter the menu and select “Manage Devices”.
-Click on “Add New” and select “VIDEO ENTRY”.
4. Device Registration:
If you have a Multi-user Gateway ( 1456B, ) and want to register via Comelit cloud, click here.
If you have a Gateway ( 1456B, 1456, 1456S ) and want to register manually, click here.
If you have a Visto Vip Wi-Fi(VS8111) click here.
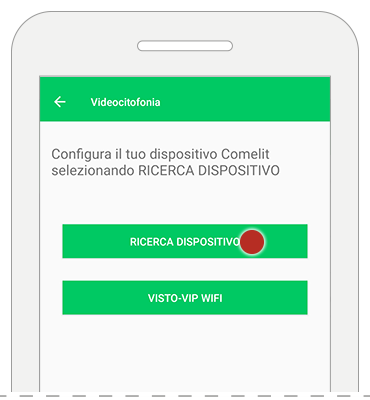
If you have a Mini Wi-Fi Video Door Entry monitor(6741W), Mini ViP Wi-Fi (6742W) o Maxi ViP Wi-Fi (6842W) proceed with the configuration
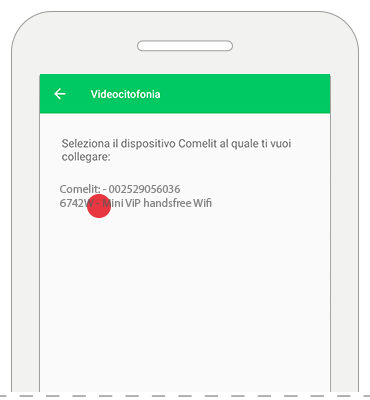
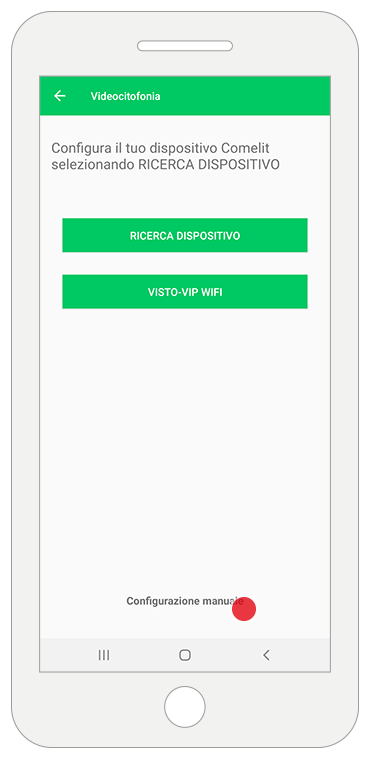
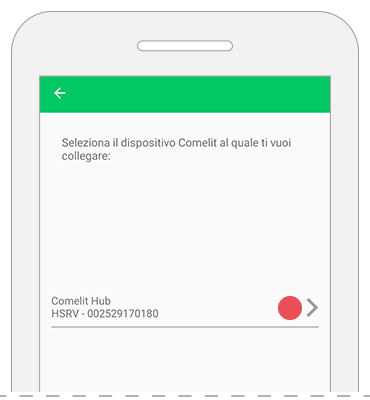
– click “Search Device” to find all Comelit video door entry devices that support the Smart Registration function
– if the Comelit device has already been connected to the Wi-Fi network and is detected by the application: select your device’s name in the App and skip to step 7;
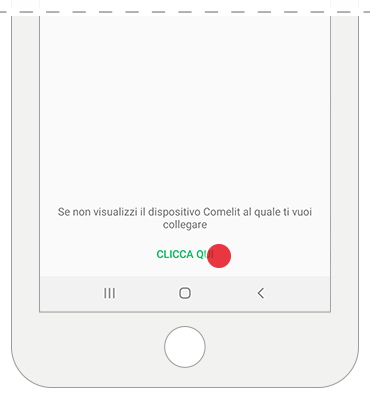
– otherwise, if you do not see the Comelit device you want to connect to (because it is not connected to the Wi-Fi network), press “click here” at the bottom of the screen and continue to step 5.
5. Connect the Comelit device to the Wi-Fi network.
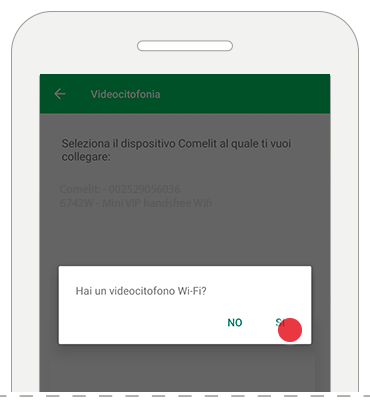
If the device has not yet been connected to the Wi-Fi network or if it is not found, the Wi-Fi connection configuration procedure will start through the Comelit APP.
– Confirm the presence of a video intercom equipped with Wi-Fi connectivity and turn on the Comelit device.
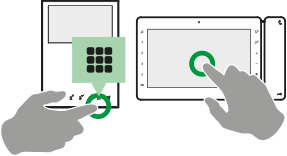
6. Check the Wi-Fi connection status on the video intercom.
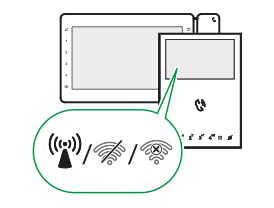
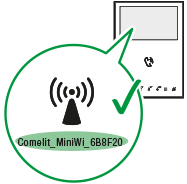
– tap in the App the symbol displayed on the Comelit device and follow the instructions identified by the same symbol (see below)
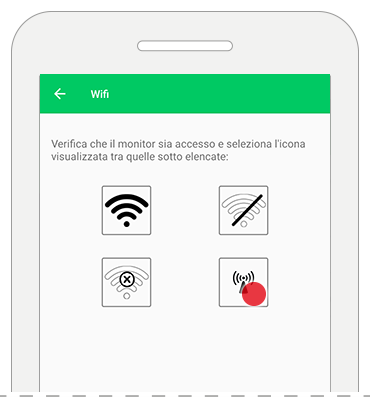
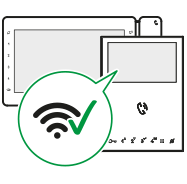
![]() Wi-Fi connected: return to step 4.
Wi-Fi connected: return to step 4.
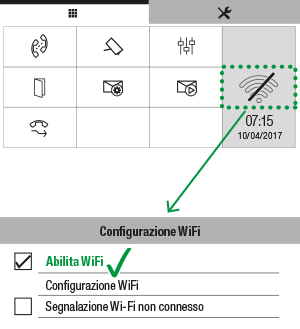
![]() Wi-Fi of the video intercom is off (only with 6842W, 6742W): access the corresponding configuration menu by selecting the icon of the turned-off Wi-Fi and select “Enable Wi-Fi”.
Wi-Fi of the video intercom is off (only with 6842W, 6742W): access the corresponding configuration menu by selecting the icon of the turned-off Wi-Fi and select “Enable Wi-Fi”.
![]() No connection: the monitor’s Wi-Fi reception is active, check the router’s condition and try again.
No connection: the monitor’s Wi-Fi reception is active, check the router’s condition and try again.

![]()
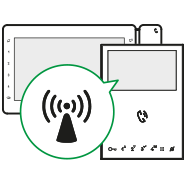
Device in access point mode:
– connect to the Comelit device’s Wi-Fi network and reopen the Comelit App
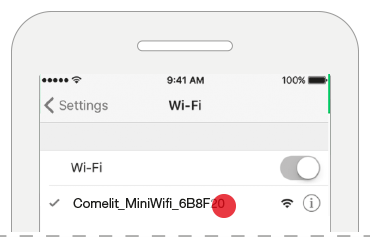
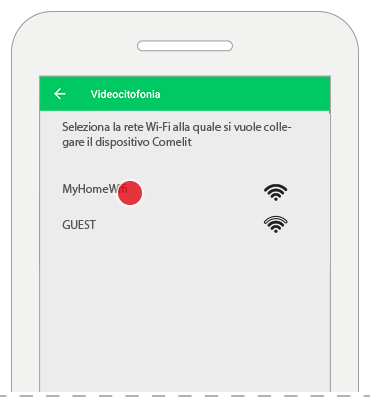
– check that the displayed network name matches that of the Comelit device and proceed
– select your home Wi-Fi network and enter the password
– before confirming, make sure the Comelit device is still on.
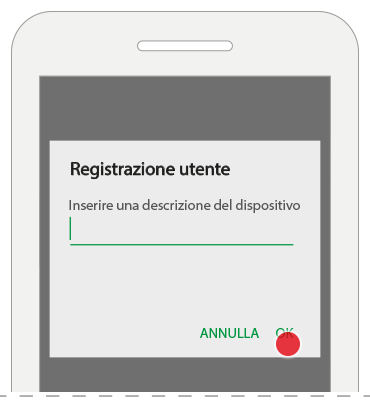
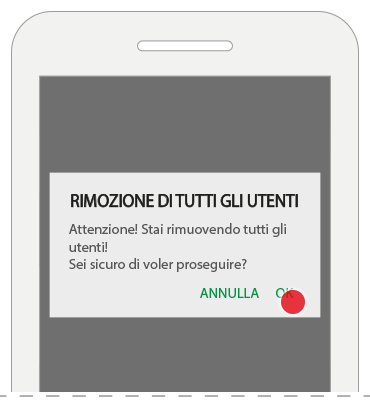
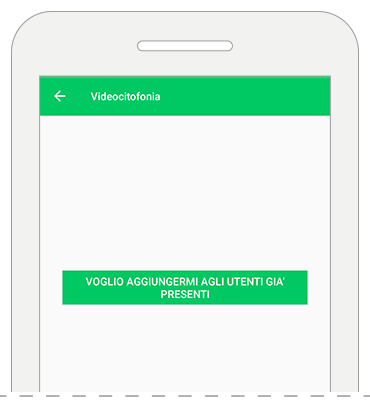
7. User Registration
Choose whether you want to add yourself as a new user or register as the sole user (deleting previously registered users), and follow the on-screen instructions to complete the registration.


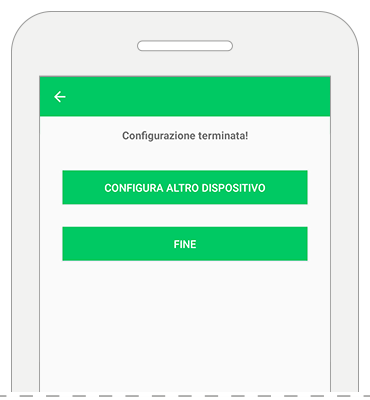
8. Complete Configuration
Choose whether to complete the configuration or add a new device to the system
– select “configure another device” to configure another system (home automation, intrusion)
– if you want to add a new home automation device, continue here
– if you want to add a new intrusion device, continue here.
– select “finish” to complete the configuration wizard
4b. Activation via cloud (available only with item 1456B)
If your user has already been configured on the Comelit cloud as the sole user for your video door entry system, the app will configure itself automatically.
– select “configure another device” to configure another system (home automation, intrusion)
– select “finish” to complete the configuration wizard
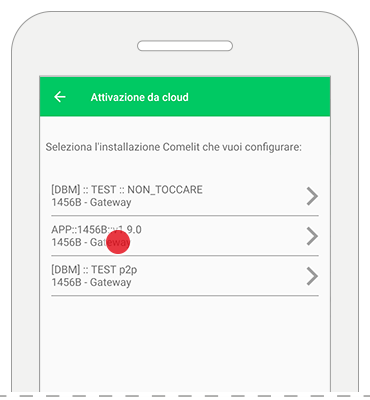
If multiple users have already been configured on the Comelit cloud for your video door entry system, you will need to choose the installation and the user you want to configure.
– select the Comelit installation you want to configure
select the user activation you want to configure
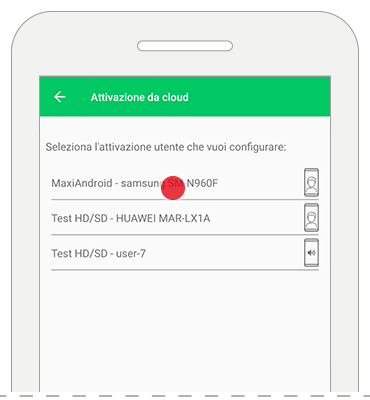
– select “configure another device” to configure another system (home automation, intrusion)
– select “finish” to complete the configuration wizard
4c. Activation via Visto ViP Wi-Fi (VS8111)
– tap “VISTO-VIP WIFI” to locate the device
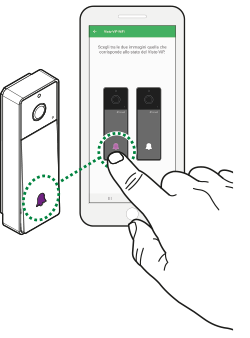
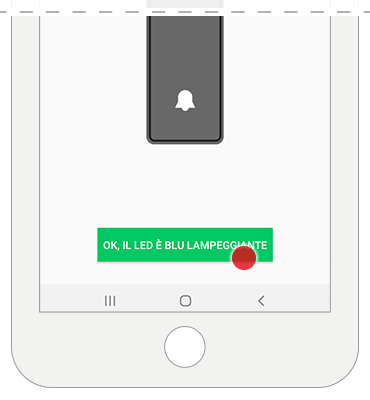
– choose the image that matches the current state of your Visto ViP
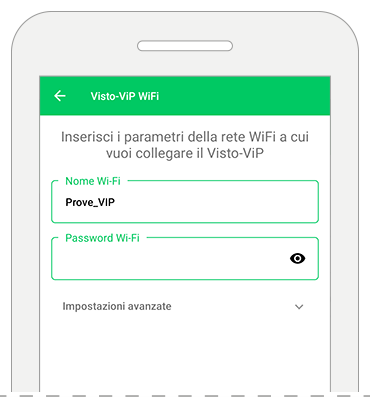
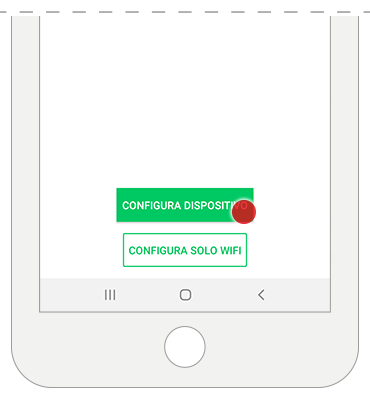
– Enter the Name and Password of the Wi-Fi network you want to connect Visto to and press “CONFIGURE WI-FI ONLY” to set up the Wi-Fi network.
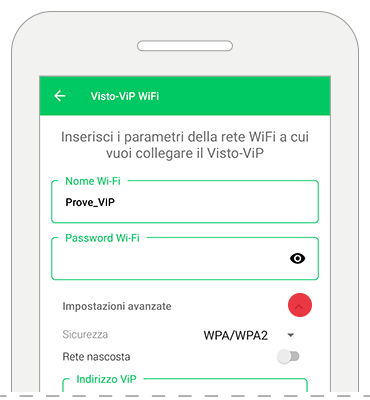
– Enter the Name and Password of the Wi-Fi network you want to connect Visto to, fill in the requested parameters in the advanced settings, and press “CONFIGURE DEVICE” to set up the Wi-Fi network and the video door entry parameters.
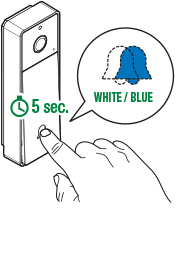
– Press and hold the call button until the LED starts flashing blue
– Press the confirmation button
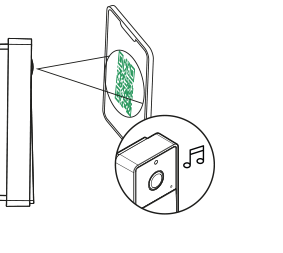
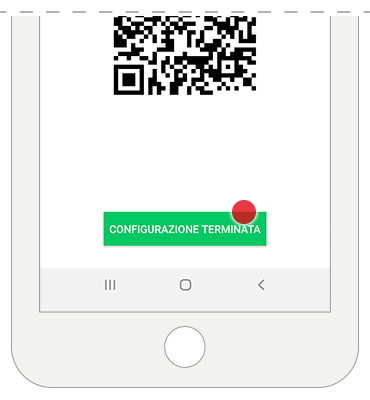
– Position the QR code about 20 cm from the Visto ViP camera, wait for the confirmation tone, and confirm the configuration
4d. Registrazione manuale ( 1456B, 1456, 1456S )
– Premi “configurazione manuale”
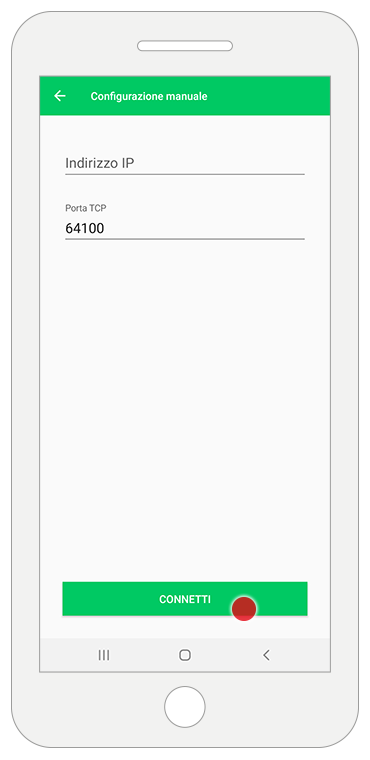
– Compila i campi richiesti con i dati forniti dal tuo installatore e premi “CONNETTI”
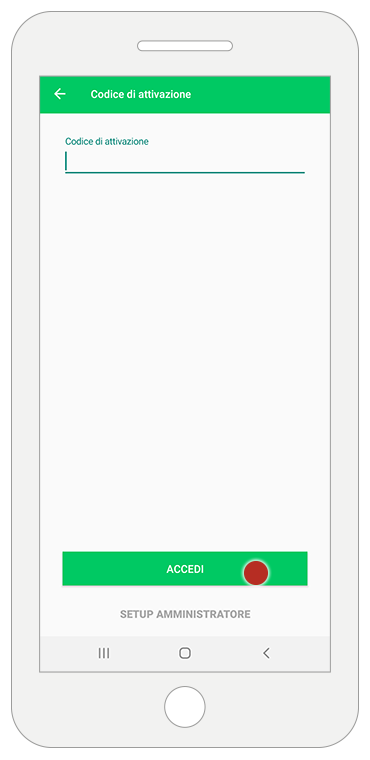
– Inserisci il codice di attivazione fornito dal tuo installatore e premi “ACCEDI”
MORE INFORMATION
With the 6741W monitor in kit mode and with the 6741W monitor in building mode with the display turned on, the following functions are available: HOME/WIDGET:
video door entry, date and time, messages, notifications, camera, actuators
VIDEO DOOR ENTRY (without the ability to add contacts to the directory)
MESSAGES (video recordings only on smartphone)
ACTUATORS (without the ability to add contacts to the directory)
DOOR RELEASE (without the ability to add contacts to the directory)
USER ADMINISTRATION
SETTINGS (Widgets, Advanced Settings)
DEVICE MANAGEMENT (Ringtone Settings, Video Recording Settings)
With the 6741W monitor in building mode with the display turned off, the following functions are available:
HOME/WIDGET: date and time, messages, notifications
MESSAGES (video recordings only on smartphone)
USER ADMINISTRATION (A pop-up appears asking to turn on the monitor)
SETTINGS (Ringtone Settings, Video Recording Settings, Advanced Settings)
DEVICE MANAGEMENT (Ringtone Settings, Video Recording Settings)
CONFIGURE YOUR HOME AUTOMATION SYSTEM
What do you need?
To manage your home automation system through the Comelit App, you need:
– A home Wi-Fi network connection
– A Comelit Hub (item 2003150) installed in the system
CONFIGURATION IS EASY. FOLLOW THESE SIMPLE STEPS!
1. Install the Comelit App (from the respective stores), connect your smartphone/tablet to your Wi-Fi network, and open the app.
2. Log in if you already have a Comelit account, or create a new one.
3. Add your home automation system:
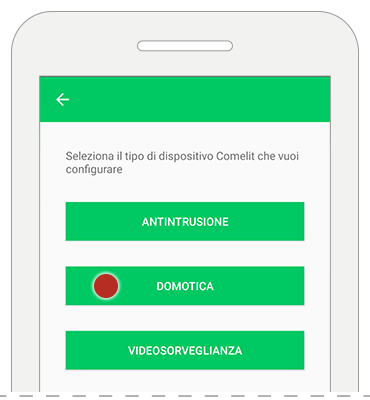
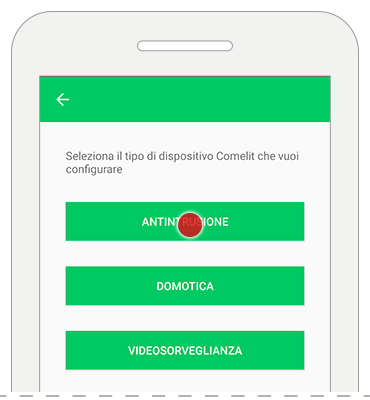
a) If no Comelit system has been configured: the app will display the following screen, select “HOME AUTOMATION”
b) If you want to add home automation to an existing system (video door entry or intrusion):
– open the menu and select “Manage Devices”
– click on “Add New” and select “HOME AUTOMATION”
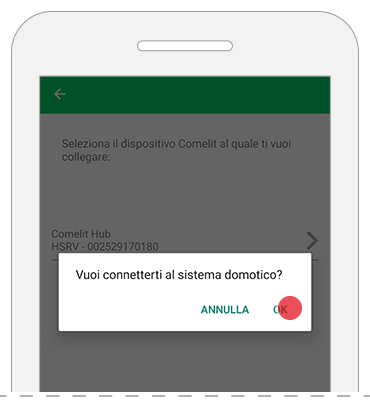
– wait while the device automatically links with the app
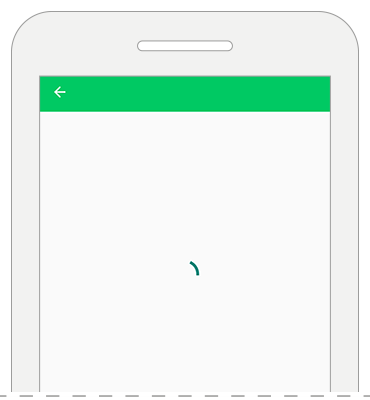
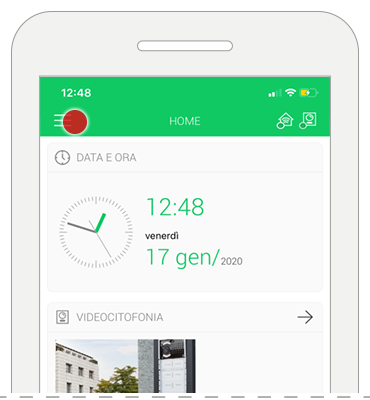
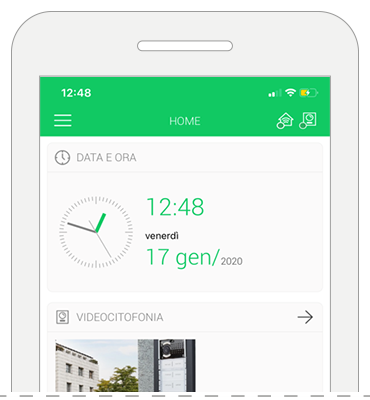
– successful linking is confirmed when the homepage of the system is displayed
5. At the end of the home automation system configuration, if set up on the Comelit Hub, the app will suggest a wizard for pairing the video door entry system and the Vedo intrusion system.
If you want to add the video door entry system via Comelit Hub click here
If you want to add the intrusion system via Comelit Hub click here
For more information on configuring the video door entry system click here
For more information on configuring the intrusion system click here
MORE INFORMATION
Do you have a Mini Touch or Planux Manager?
Both supervisors cannot communicate with the Comelit Hub, which means that through the Comelit App it will be possible to send commands and receive status updates, but NOT update the supervisors’ configuration.
Example: scenarios/schedules created on Mini Touch or Planux Manager will not be visible in the Comelit App; scenarios/schedules created on the Comelit App will not be visible on Mini Touch or Planux Manager.
Do you have an Icona Manager?
Icona Manager can communicate with Comelit Hub but must be updated to version 3.0.1 or later (please note that updates can only be performed by an installer).
If communication with the Comelit Hub is enabled, it will be possible to send commands, receive statuses, and update supervisor configurations through the Comelit App.
Example: scenarios/schedules created on Icona Manager will be visible on the Comelit App and vice versa.
Do you have a Maxi Manager?
Maxi Manager communicates with the Comelit Hub, so it will be possible to send commands, receive statuses, and update supervisor configurations through the Comelit App.
Example: scenarios/schedules created on Maxi Manager will be visible on the Comelit App and vice versa.
Do you have a Serial Bridge?
Serial Bridge cannot communicate with Comelit Hub. If you plan to replace the Serial Bridge with the Comelit Hub, we recommend contacting your trusted installer to evaluate the necessary steps for proper system modification.
Do you have an intrusion system with a Vedo control panel?
To communicate with the Comelit Hub, the Vedo panel must be equipped with the VEDOIP board, as communication with the Hub takes place via LAN.
Versions compatible with Comelit Hub: VEDO: 2.10.3 or VEDOIP: 2.7.3.
CONFIGURE YOUR ALARM SYSTEM
What do you need?
To manage the intrusion system via the Comelit App, you need:
– a Vedo control panel (with firmware version 2.10 or higher*) or a Secur Hub control panel
– the alarm control panel connected to the internet via LAN, Wi-Fi (only for Secur Hub panels), 2G, or 3G
* or version 2.7 if you do not use the “Temporary Code” method for registration
CONFIGURATION IS EASY. FOLLOW THESE SIMPLE STEPS!
1. Make sure your smartphone/tablet is connected to the internet (Wi-Fi or mobile data), install the Comelit App from the respective stores, and open it.
2. Log in if you already have a Comelit account, or create a new one.
3. Add your intrusion system
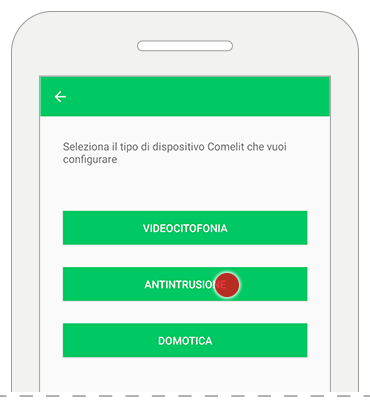
a) If no Comelit system has been configured: the app will display the following screen, select “INTRUSION”
b) If you want to add the intrusion system to an existing system (home automation or video door entry):
– open the menu and select “Manage Devices”
– click on “Add New” and select “INTRUSION”
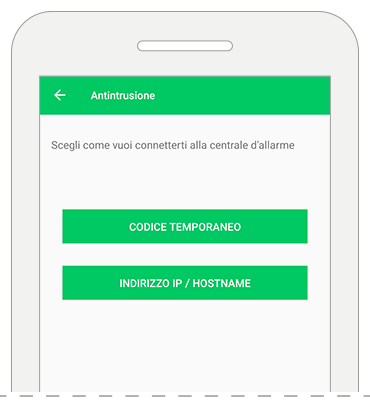
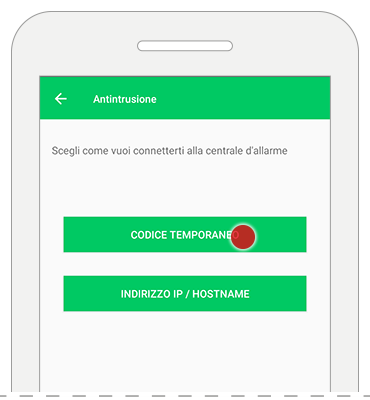
4. Get Temporary Code
– select “TEMPORARY CODE”
Now you will need to obtain a temporary code from the alarm system’s keypad to activate the app.
Reminder: codes are valid for 10 minutes. After that, they will expire, and a new code will be required.
Below is the procedure to obtain the temporary code for both Vedo and Secur Hub systems.
If you have a Vedo panel, click here
If you have a Secur Hub panel, click here
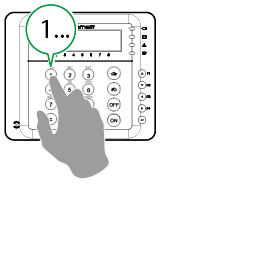
4a. Procedure for Vedo System
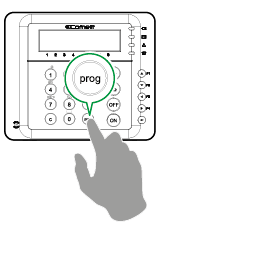
– on the keypad, enter the user code and press the PROG button
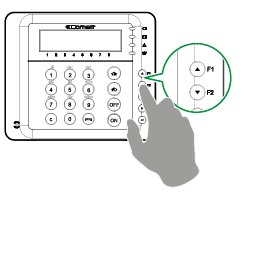
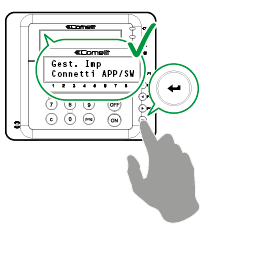
– use the up/down arrows to select the menu “CONNECT APP/SW” and press enter
– select a free APP ID (the keypad automatically suggests the first available APP ID) and press enter

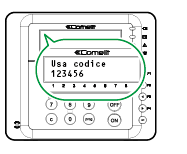
– wait a few seconds: the keypad will display the message “USE CODE” followed by a 5-character code.
This is the code to enter in the Comelit App, go to step 5
4b. Procedure for Secur Hub System
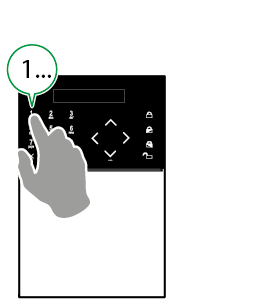
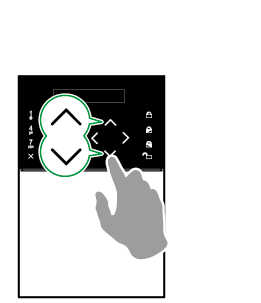
– on the keypad, enter the user code and press the “down arrow” button to access the user menu
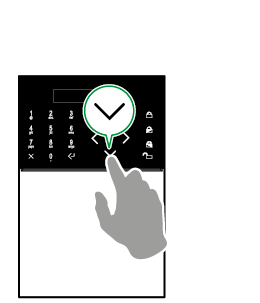
– use the “up/down” arrows to select the “GENERAL PARAMETERS” menu and press enter

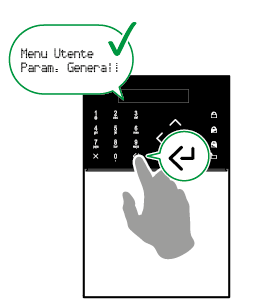
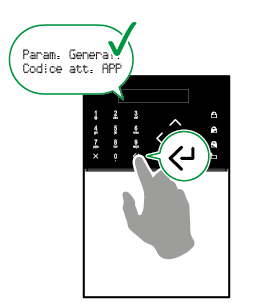
– use the “up/down” arrows to select the “APP ACTIVATION CODE” menu and press enter
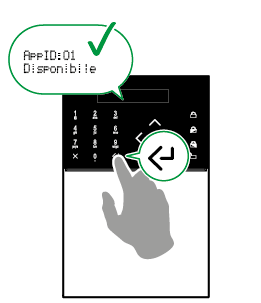
– select a free APP ID (the keypad will automatically suggest the first available APP ID) and press enter
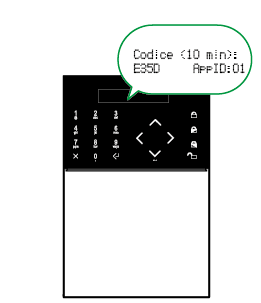
– wait a few seconds: the keypad will display the message “CODE <10 min>” followed by a 5-character code.
This is the code to enter in the Comelit App, go to step 5
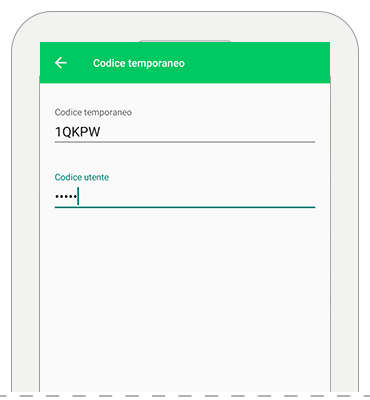
5. Enter the Temporary Code in the Comelit App
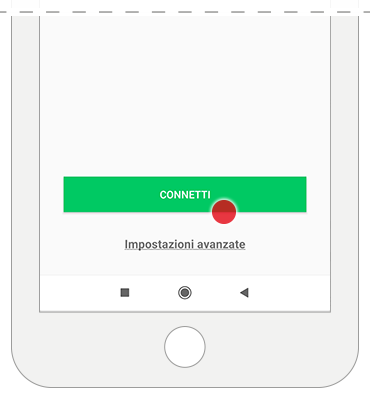
– enter the “temporary code” and the “user code” in the appropriate fields and press “CONNECT”.
The app will attempt to connect to the control panel.
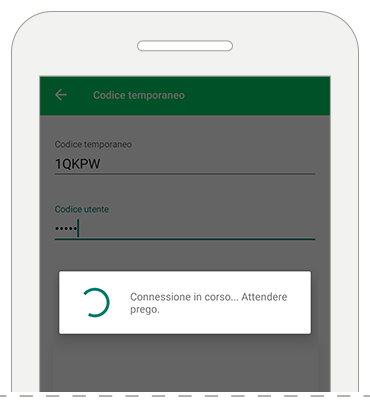
If the connection to the control panel is successful, the app will begin syncing all the necessary parameters.
6. Complete Configuration
At the end of the synchronization, choose whether to complete the configuration or add a new device to the system.
– select “configure another device” to configure another system (home automation, video door entry)
– select “finish” to complete the configuration wizard
MORE INFORMATION
Note: it is also possible to register the control panel on the Comelit App using the “IP Address/Hostname” mode, which requires manual entry of the connection parameters in the app menu.
In this case, the control panel firmware version must be at least 2.7.
Please consult your trusted installer for more information on this registration method.